Introduction
Creating modern desktop applications often involves choosing between languages and ecosystems: C# for fast GUI development with WinForms, or Python for its rich ecosystem of data processing and visualization libraries. But what if you could combine the strengths of both—without rewriting code or setting up complex interop layers?
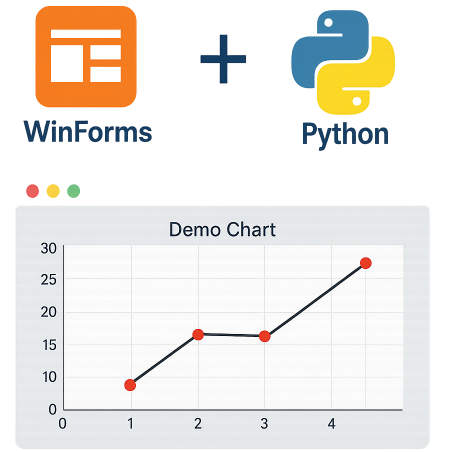
In this article, we’ll show you how to build a .NET WinForms application that leverages Python logic to generate dynamic SVG charts. Using Javonet, a cross-language integration bridge, you can seamlessly call Python code from your C# application with zero hassle. The result is a clean and maintainable hybrid architecture where C# handles the interface, and Python does the heavy lifting for data visualization.
Let’s walk through a practical example: a chart editor in WinForms that takes X and Y values from the user and visualizes them using Python’s svgwrite library. You’ll see how easy it is to pass data between the two worlds—and how little boilerplate is needed.
Prerequisites
Before you get started, make sure you have the following tools and packages installed:
- Visual Studio 2019+ (or any IDE with .NET WinForms support)
- A .NET Framework or .NET Core WinForms project
- The following NuGet packages added to your project:
Python side
- Python 3.8 or later
- Install the svgwrite package:
Creating the Python Charts Class
We’ll now create the core component on the Python side: a class called Charts that generates an SVG line chart using the svgwrite library.
This class will expose a method named generate_line_chart_svg(...) which accepts a title, a list of X and Y values, and returns a raw SVG string ready to be rendered inside a WinForms PictureBox.
charts.py
Before wiring this up to your C# application, you can easily test the chart generator on its own. The following helper function allows you to render the SVG in a temporary HTML file and open it in your default browser.
You can call this test locally using the standard Python __main__ entry point:
✅ What to Expect
Running the script will open your browser with a simple line chart. This ensures that your Python environment, the svgwrite package, and the SVG rendering logic all work before integrating with the .NET layer through Javonet.
On the .NET side, we’ll use WinForms to build a minimal user interface that lets the user input chart data (as comma-separated values) and displays the generated SVG chart.
Our UI is composed of two main components:
ChartInputPanel – A panel with input fields and a button to trigger chart generation.ChartDisplayPanel – A picture box capable of rendering SVG content returned from Python.
ChartInputPanel.cs
This panel handles user input and parses it into numeric arrays.
ChartInputEventArgs.cs
This simple data container class is used to pass chart data (X and Y arrays) when the user clicks “Generate Chart”.
ChartDisplayPanel.cs
This component is a customized PictureBox that knows how to render an SVG image using Svg.Skia and SkiaSharp.
Calling Python from C# with Javonet
Designing the MainForm.cs
The MainForm class is the entry point of your WinForms application. It brings together the UI components and the logic required to communicate with Python through Javonet. Here’s how it works step-by-step.
Layout and Components
The form is divided into two main sections:
- Left Panel – Contains the
ChartInputPanel with fields to enter X and Y values.
- Main Area – A
ChartDisplayPanel that renders the SVG chart based on the Python output.
These components are added using DockStyle so the layout is responsive and clean.
MainForm.cs – Constructor Overview
Explanation:
Text and Size set the window title and dimensions._inputPanel is docked to the left, taking fixed width._chartDisplay fills the remaining space, scaling automatically.- The event
GenerateChartClicked is subscribed to by OnGenerateChart, which will later call Python and render the result.
- The
[ ... ] placeholder will contain Javonet runtime initialization (we’ll fill it in the next section).
Completing the MainForm Constructor
Python Runtime Initialization
To finish the MainForm setup, we need to initialize the Javonet runtime for Python and load the Charts class from your Python script.
This initialization should happen directly inside the constructor, after adding UI controls but before the call to InitializeComponent() (or right after, depending on your layout preference).
Here’s what this final initialization block should do:
- Activate the Javonet using your API key.
- Initialize the Python runtime context.
- Set the
RuntimeClasspath to point to the folder where charts.py is located.
- Load the
Charts class from Python and create its instance.
- Store that instance in a private field so it can be used later to generate charts.
This instance (chartsInstance) will then be used in the OnGenerateChart(...) method to call the generate_line_chart_svg(...) function and get the resulting SVG.
⚠️ Make sure the path to your charts.py is correct and Python is installed and accessible from the system PATH.
Our constructor should look like this:
Implementing OnGenerateChart – Calling Python and Rendering the Chart
With the UI layout complete and the Python Charts class successfully loaded using Javonet, it’s time to implement the heart of the interaction: the OnGenerateChart method.
This method will be triggered whenever the user clicks the “Generate Chart” button. Here’s what it needs to accomplish:
- Read the X and Y values from the event arguments (
ChartInputEventArgs).
- Call the Python method
generate_line_chart_svg(...) using the Javonet instance of the Charts class.
- Receive the SVG content as a string.
- Render the SVG into a
Bitmap using Svg.Skia and show it in the ChartDisplayPanel.
By the end of this step, you’ll have a fully working hybrid desktop application — a native .NET UI powered by Python logic behind the scenes.
Final implementation of the OnGenerateChart() method should look like this:
Conclusion
By combining the strengths of .NET WinForms for user interfaces and Python for expressive data visualization, you unlock the best of both worlds. Thanks to Javonet, integrating Python logic into your C# application becomes a straightforward and elegant process—no external processes, no manual data serialization, and no glue code.
Whether you want to reuse existing Python models, call scientific libraries, or offload chart generation like in our example, Javonet makes cross-language integration effortless. In just a few lines of code, you can call Python methods, receive SVG strings, and render them natively inside your .NET application.
This approach not only saves time and effort but also encourages modular, maintainable, and multi-language development—ideal for teams that already rely on Python for logic or analytics.
Try it yourself and see how Javonet opens up a whole new layer of flexibility in desktop application development.
Introduction
Creating modern desktop applications often involves choosing between languages and ecosystems: C# for fast GUI development with WinForms, or Python for its rich ecosystem of data processing and visualization libraries. But what if you could combine the strengths of both—without rewriting code or setting up complex interop layers?
In this article, we’ll show you how to build a .NET WinForms application that leverages Python logic to generate dynamic SVG charts. Using Javonet, a cross-language integration bridge, you can seamlessly call Python code from your C# application with zero hassle. The result is a clean and maintainable hybrid architecture where C# handles the interface, and Python does the heavy lifting for data visualization.
Let’s walk through a practical example: a chart editor in WinForms that takes X and Y values from the user and visualizes them using Python’s svgwrite library. You’ll see how easy it is to pass data between the two worlds—and how little boilerplate is needed.
Prerequisites
Before you get started, make sure you have the following tools and packages installed:
.NET (C#/WinForms) side
Python side
Creating the Python
ChartsClassWe’ll now create the core component on the Python side: a class called
Chartsthat generates an SVG line chart using thesvgwritelibrary.This class will expose a method named
generate_line_chart_svg(...)which accepts a title, a list of X and Y values, and returns a raw SVG string ready to be rendered inside a WinFormsPictureBox.charts.pyBefore wiring this up to your C# application, you can easily test the chart generator on its own. The following helper function allows you to render the SVG in a temporary HTML file and open it in your default browser.
You can call this test locally using the standard Python
__main__entry point:✅ What to Expect
Running the script will open your browser with a simple line chart. This ensures that your Python environment, the
svgwritepackage, and the SVG rendering logic all work before integrating with the .NET layer through Javonet.Building the WinForms UI in C#
On the .NET side, we’ll use WinForms to build a minimal user interface that lets the user input chart data (as comma-separated values) and displays the generated SVG chart.
Our UI is composed of two main components:
ChartInputPanel– A panel with input fields and a button to trigger chart generation.ChartDisplayPanel– A picture box capable of rendering SVG content returned from Python.ChartInputPanel.csThis panel handles user input and parses it into numeric arrays.
ChartInputEventArgs.csThis simple data container class is used to pass chart data (X and Y arrays) when the user clicks “Generate Chart”.
ChartDisplayPanel.csThis component is a customized PictureBox that knows how to render an SVG image using Svg.Skia and SkiaSharp.
Calling Python from C# with Javonet
Designing the MainForm.cs
The
MainFormclass is the entry point of your WinForms application. It brings together the UI components and the logic required to communicate with Python through Javonet. Here’s how it works step-by-step.Layout and Components
The form is divided into two main sections:
ChartInputPanelwith fields to enter X and Y values.ChartDisplayPanelthat renders the SVG chart based on the Python output.These components are added using
DockStyleso the layout is responsive and clean.MainForm.cs – Constructor Overview
Explanation:
TextandSizeset the window title and dimensions._inputPanelis docked to the left, taking fixed width._chartDisplayfills the remaining space, scaling automatically.GenerateChartClickedis subscribed to byOnGenerateChart, which will later call Python and render the result.[ ... ]placeholder will contain Javonet runtime initialization (we’ll fill it in the next section).Completing the MainForm Constructor
Python Runtime Initialization
To finish the
MainFormsetup, we need to initialize the Javonet runtime for Python and load the Charts class from your Python script.This initialization should happen directly inside the constructor, after adding UI controls but before the call to
InitializeComponent()(or right after, depending on your layout preference).Here’s what this final initialization block should do:
RuntimeClasspathto point to the folder wherecharts.pyis located.Chartsclass from Python and create its instance.This instance (
chartsInstance) will then be used in theOnGenerateChart(...)method to call thegenerate_line_chart_svg(...)function and get the resulting SVG.⚠️ Make sure the path to your
charts.pyis correct and Python is installed and accessible from the system PATH.Our constructor should look like this:
Implementing
OnGenerateChart– Calling Python and Rendering the ChartWith the UI layout complete and the Python
Chartsclass successfully loaded using Javonet, it’s time to implement the heart of the interaction: theOnGenerateChartmethod.This method will be triggered whenever the user clicks the “Generate Chart” button. Here’s what it needs to accomplish:
ChartInputEventArgs).generate_line_chart_svg(...)using the Javonet instance of theChartsclass.BitmapusingSvg.Skiaand show it in theChartDisplayPanel.By the end of this step, you’ll have a fully working hybrid desktop application — a native .NET UI powered by Python logic behind the scenes.
Final implementation of the
OnGenerateChart()method should look like this:Conclusion
By combining the strengths of .NET WinForms for user interfaces and Python for expressive data visualization, you unlock the best of both worlds. Thanks to Javonet, integrating Python logic into your C# application becomes a straightforward and elegant process—no external processes, no manual data serialization, and no glue code.
Whether you want to reuse existing Python models, call scientific libraries, or offload chart generation like in our example, Javonet makes cross-language integration effortless. In just a few lines of code, you can call Python methods, receive SVG strings, and render them natively inside your .NET application.
This approach not only saves time and effort but also encourages modular, maintainable, and multi-language development—ideal for teams that already rely on Python for logic or analytics.
Try it yourself and see how Javonet opens up a whole new layer of flexibility in desktop application development.